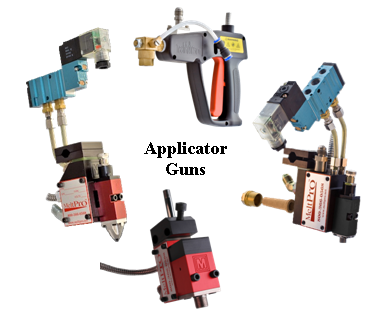
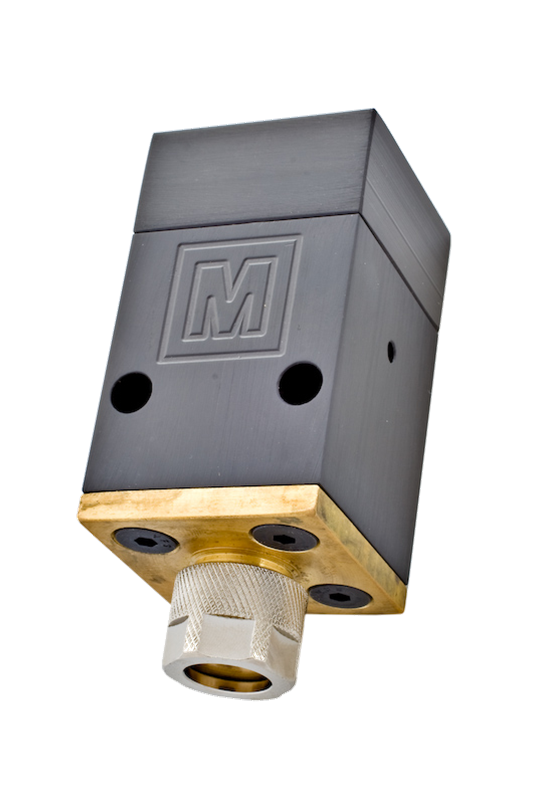
When it comes to Applicator glue guns, there are a large number of different configurations to pick from. In the “Applicators” section of our on-line catalog, you will find some of the more common glue gun part numbers and the systems that they work with.
There is also a “Configuration Carousel” below that you can use to create an applicator part number. Again, this configurator will help you put together the part number for a lot of different applicators but by far not all of them. If you are not able to configure an applicator that you need from the carousel below, please contact MeltPro for help.
If you need to refresh your knowledge on the basic make up and terminology that is used with Applicator Glue Guns, further on down this web page is an area where you can read up on just what an applicator gun is. It will help you to look over that information before using our “Applicator Configurator” to create your own gun part number.
Sample Part Number ( 20A42-N7EIPHN-2-3 )
This is Your Applicator Part Number & the description of the gun.
Scroll side to side thru this carousel to pick out the options you need for your applicator gun.
The options that you can pick from in this Applicator Configurator are for only the more common types of glue gun setups. MeltPro can produce glue guns to meet many different needs so if you are not able to configure an Applicator from the options shown here, please contact MeltPro for assistance.
PICK #1 Module Type
From the drop down list, pick the type of glue module that mounts to the front of the applicator. If you need to you can "click here" to go to our module page to read more about the glue modules.
PICK #2 Glue Orifice Size
From the drop down list, pick the glue orifice size for the 8000 module type. The 8000 modules have a fixed glue orifice hole that cannot be changed out.
PICK #11 Adjustable or Non-Adjustable Module
From the drop down list pick if you want the standard Adjustable type of module or if you need the Non-Adjustable type of module mounted to the applicator gun.
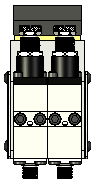
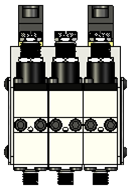
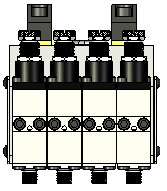
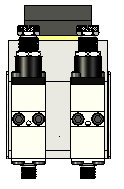
PICK #3 Number of Modules
From the drop down list, pick the number of glue modules you need on the applicator.
Glue guns can have many more modules then what you can pick from on this configuator. If you need more modules please contact MeltPro.
PICK #4 Expanded Guns
From the drop down list, pick weather any of the modules need to be spaced apart from each other.
PICK #5 1st Expanded Size
From the drop down list, pick the type of spacing that is needed between the applicator modules if it is an expanded type of an applicator.
PICK #6 Air Porting
From the drop down list, pick weather or not if the applicator modules will fire from one common source of air or if any of them need to operate independantly from each other.
PICK #7 Air Operation
From the drop down list, pick if the applicator needs to operate in a spring close or an air close type of operation.
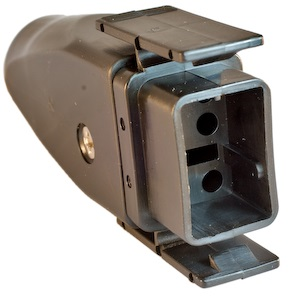
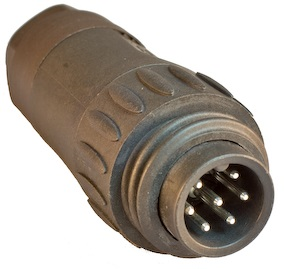
PICK #8 Cable Assembly
From the drop down list, pick the type of electrical cable. This is matched up to the Model of the melt unit.
Other cable options are available; please contact MeltPro for other options.
PICK #9 From the drop down list, pick the power voltage for the applicator.
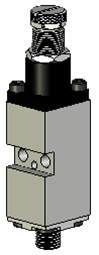
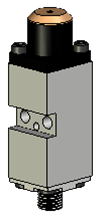
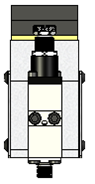
PICK #10 Gun Body Style
From the drop down list, pick the type of applicator body style that you need.
That’s it!!! You have just created your own Applicator Glue Gun Assembly. Take some time to look over the gun layout descriptions above to confirm that everything meets your needs. If you need to change anything you can use the “side to side” arrows by the reset button below to go back and change any choices that you need to. Or you can click the “Reset” button and start over.
MPS2000 Series
MPS8000 Series
MPS7000 Series
LT5000 Series
NO3000 Series
The size of the hole where the glue actually comes out.
Standard Adjustable Module
Optional Non-Adjustable Module
Standard "E" spacing of 1.5" between the center line of the 2 middle modules.
Custome spacing between the center line of any 2 modules.
This is only picked if you picked "Spaced Apart" in pick #4. Here you need to pick out the spacing distance for guns that have expanded centers. The expanded distance is between the center line of 2 modules and not the gap distance between the module bodies.
(Common Air) All the modules operate from one source of air.
(Independant Air) You can have all of the modules or any group of them to operate independantly from each other on the same glue gun. This gun shows the 2 modules on each end of the gun are setup to operate independantly.
Spring Close guns will have only 1 air line connection.
Air Close guns will have 2 air line connections.
Common for Slautterback®
Common for ITW®
Common for Nordson® standard
Common for Nordson® washdown
If you are not sure of the voltage you need, check the ID name plate on the melt unit to verify the voltage that the system is operating on.
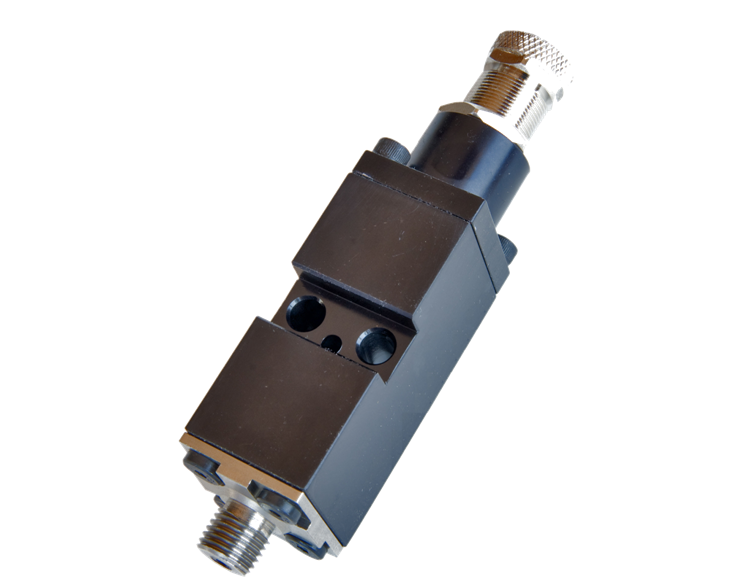
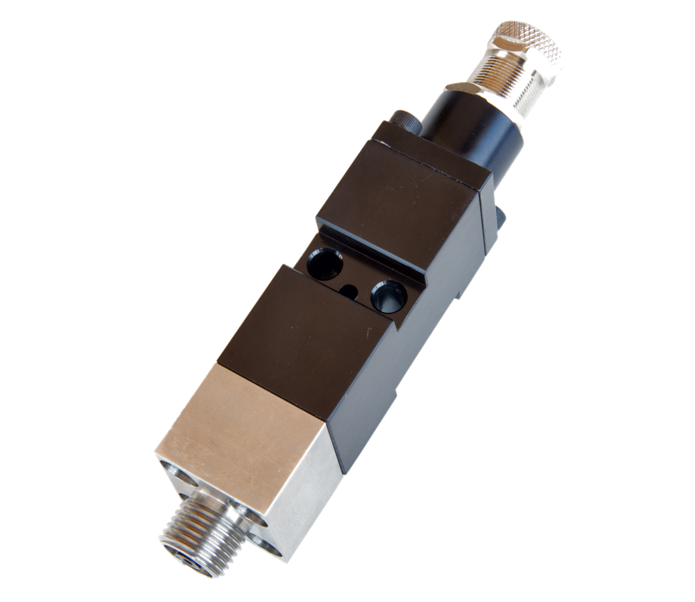
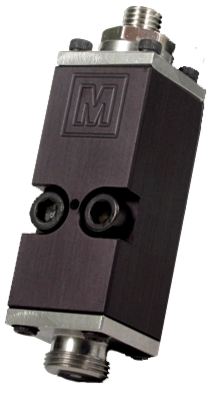
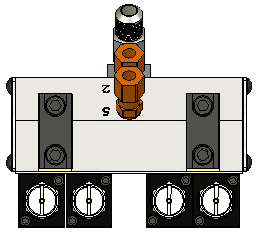
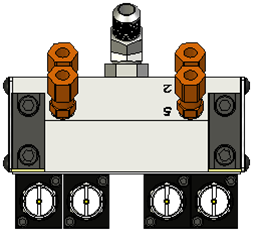
This is the "A" style gun body. It has a slanted back, it has only 1 fluid port, and it does not have a built in fluid filter.
This is the "F" style gun body. It is more block shaped, it has 2 fluid port options, and has an internal fluid filter built into it.
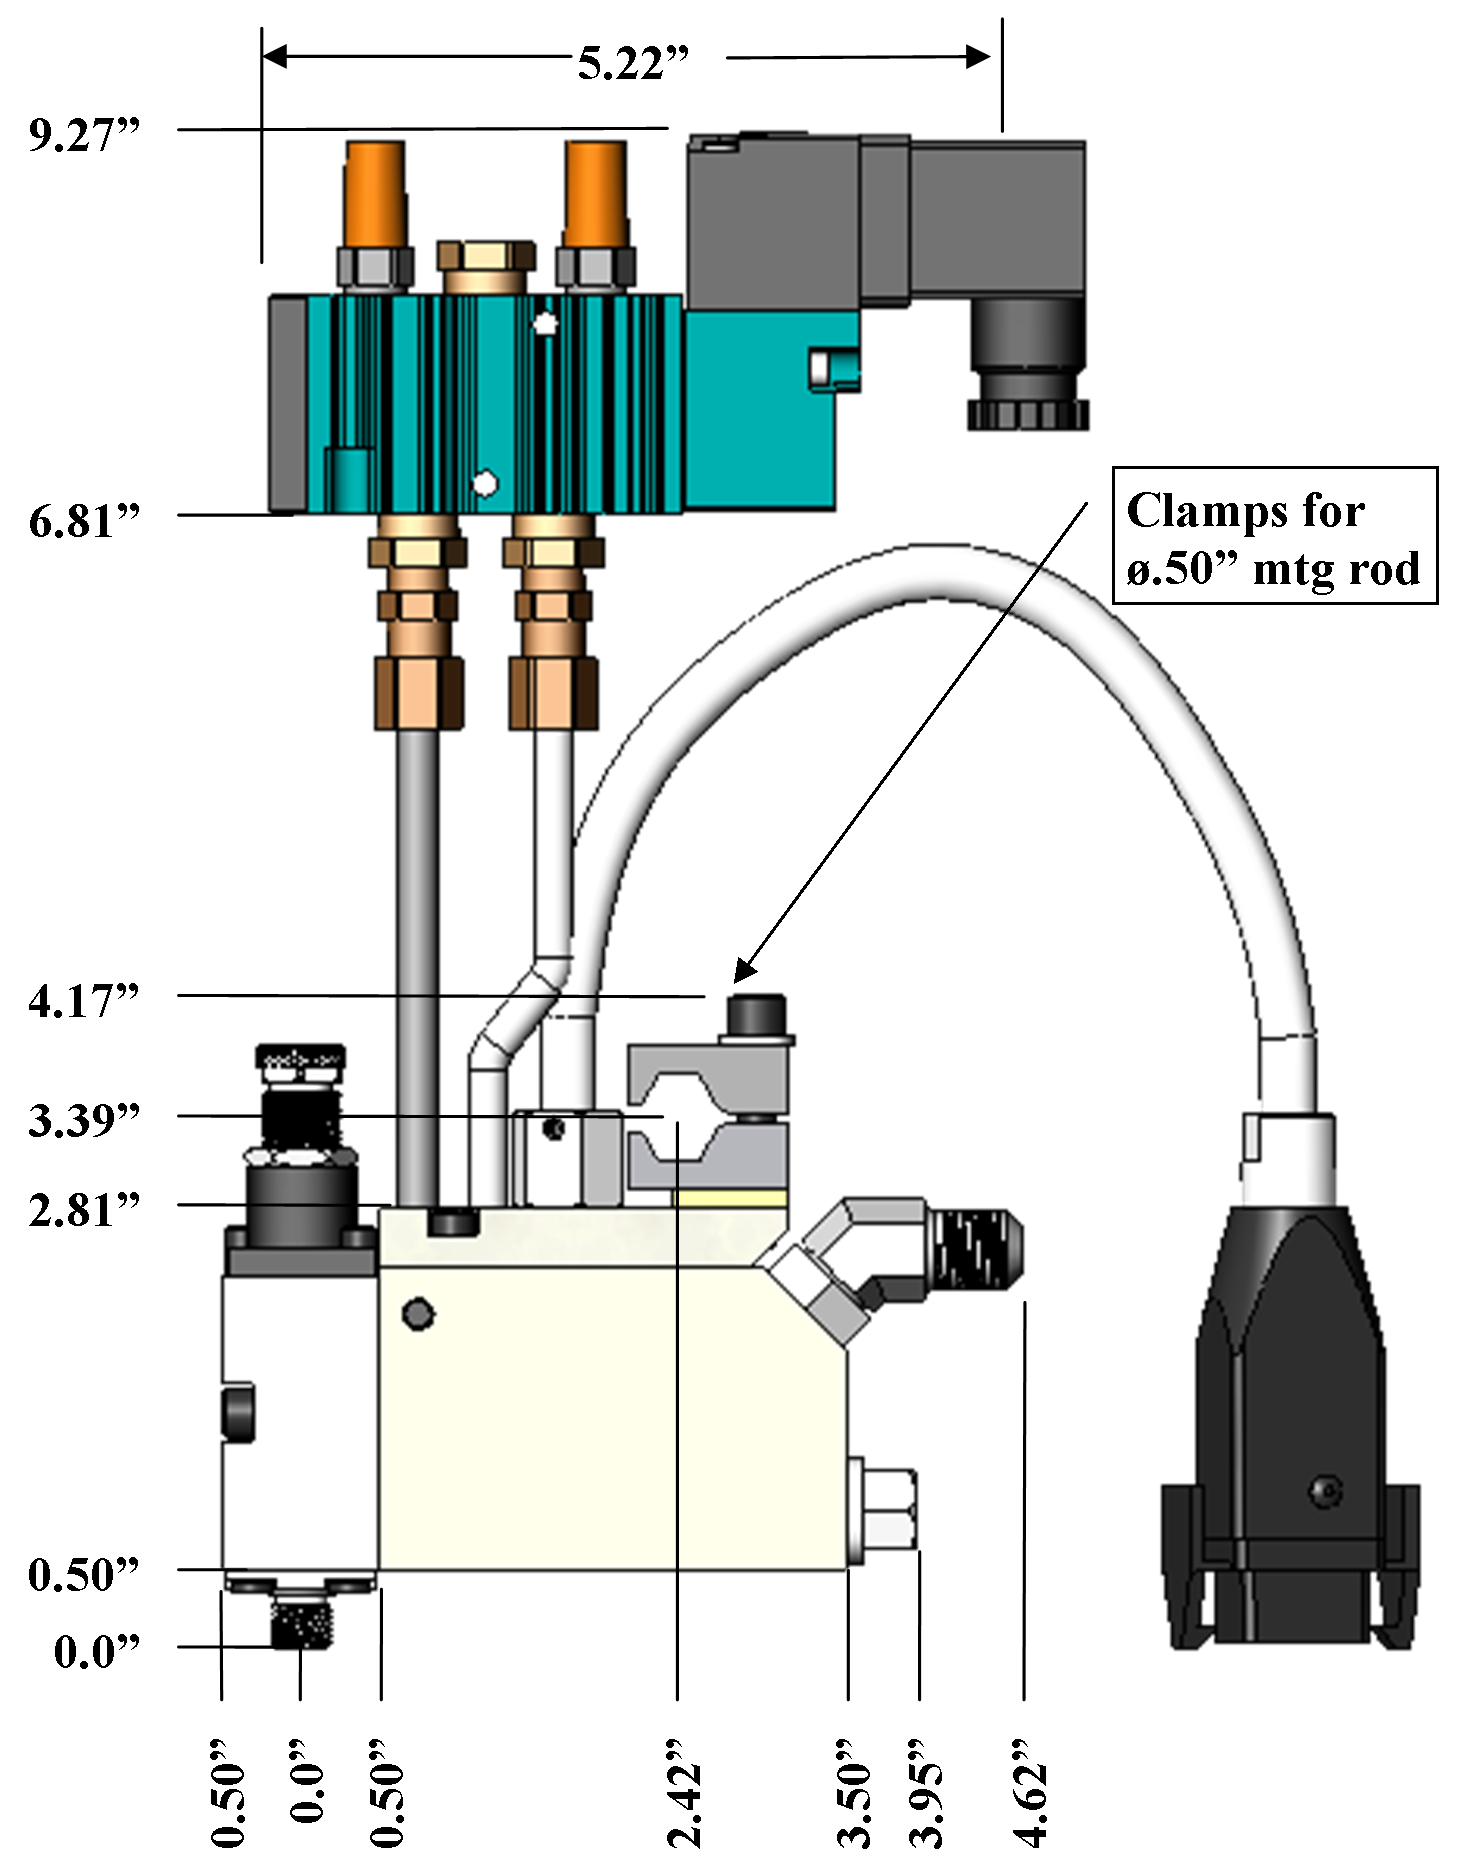
This is the "S" style gun body. It is also known as a "Low Profile" gun. It has 1 extended fluid port, no internal filter, and a mounting rod to help it mount into tight areas.
Once you are sure of your choices, you can contact MeltPro and turn in the Applicator Gun part number that was created by this Configurator to get a quote for your glue gun.
MeltPro also produces a “Slim-Line” style of applicator gun. This applicator is made to fit into very tight spaces and has an overall smaller foot print than other applicators.
MeltPro’s “MG” (Mini-Gun) gun is compatible with the Nordson® version of “Mini-Blue” applicator.
The “MG” gun comes equipped with a built in quick change glue filter, an air solenoid valve to operate the gun, and can be configured to work with most other OEM’s melt units and hoses.
Use the Mini-Gun Configurator chart below to create an applicator gun part number for your needs.
Below here you can refresh your knowledge on the basic make up and terminology that is used with Applicator Glue Guns. It will help you to know just what you get (or what you need to get) when you order a glue gun and the common terms that are used to describe the parts of a gun. It may help you to look over this information before using our “Applicator Configurator” above to create your own gun part number.
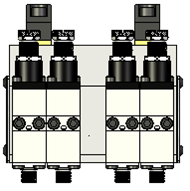
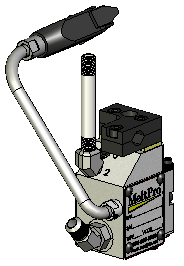
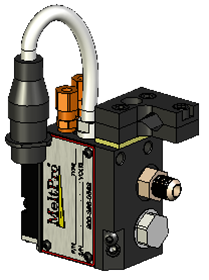
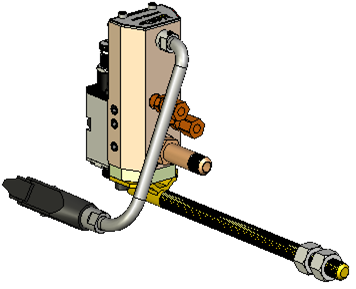
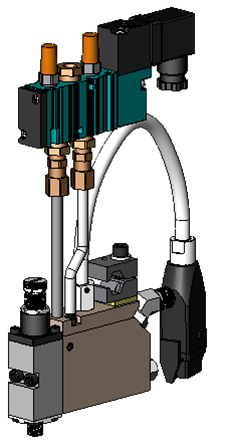
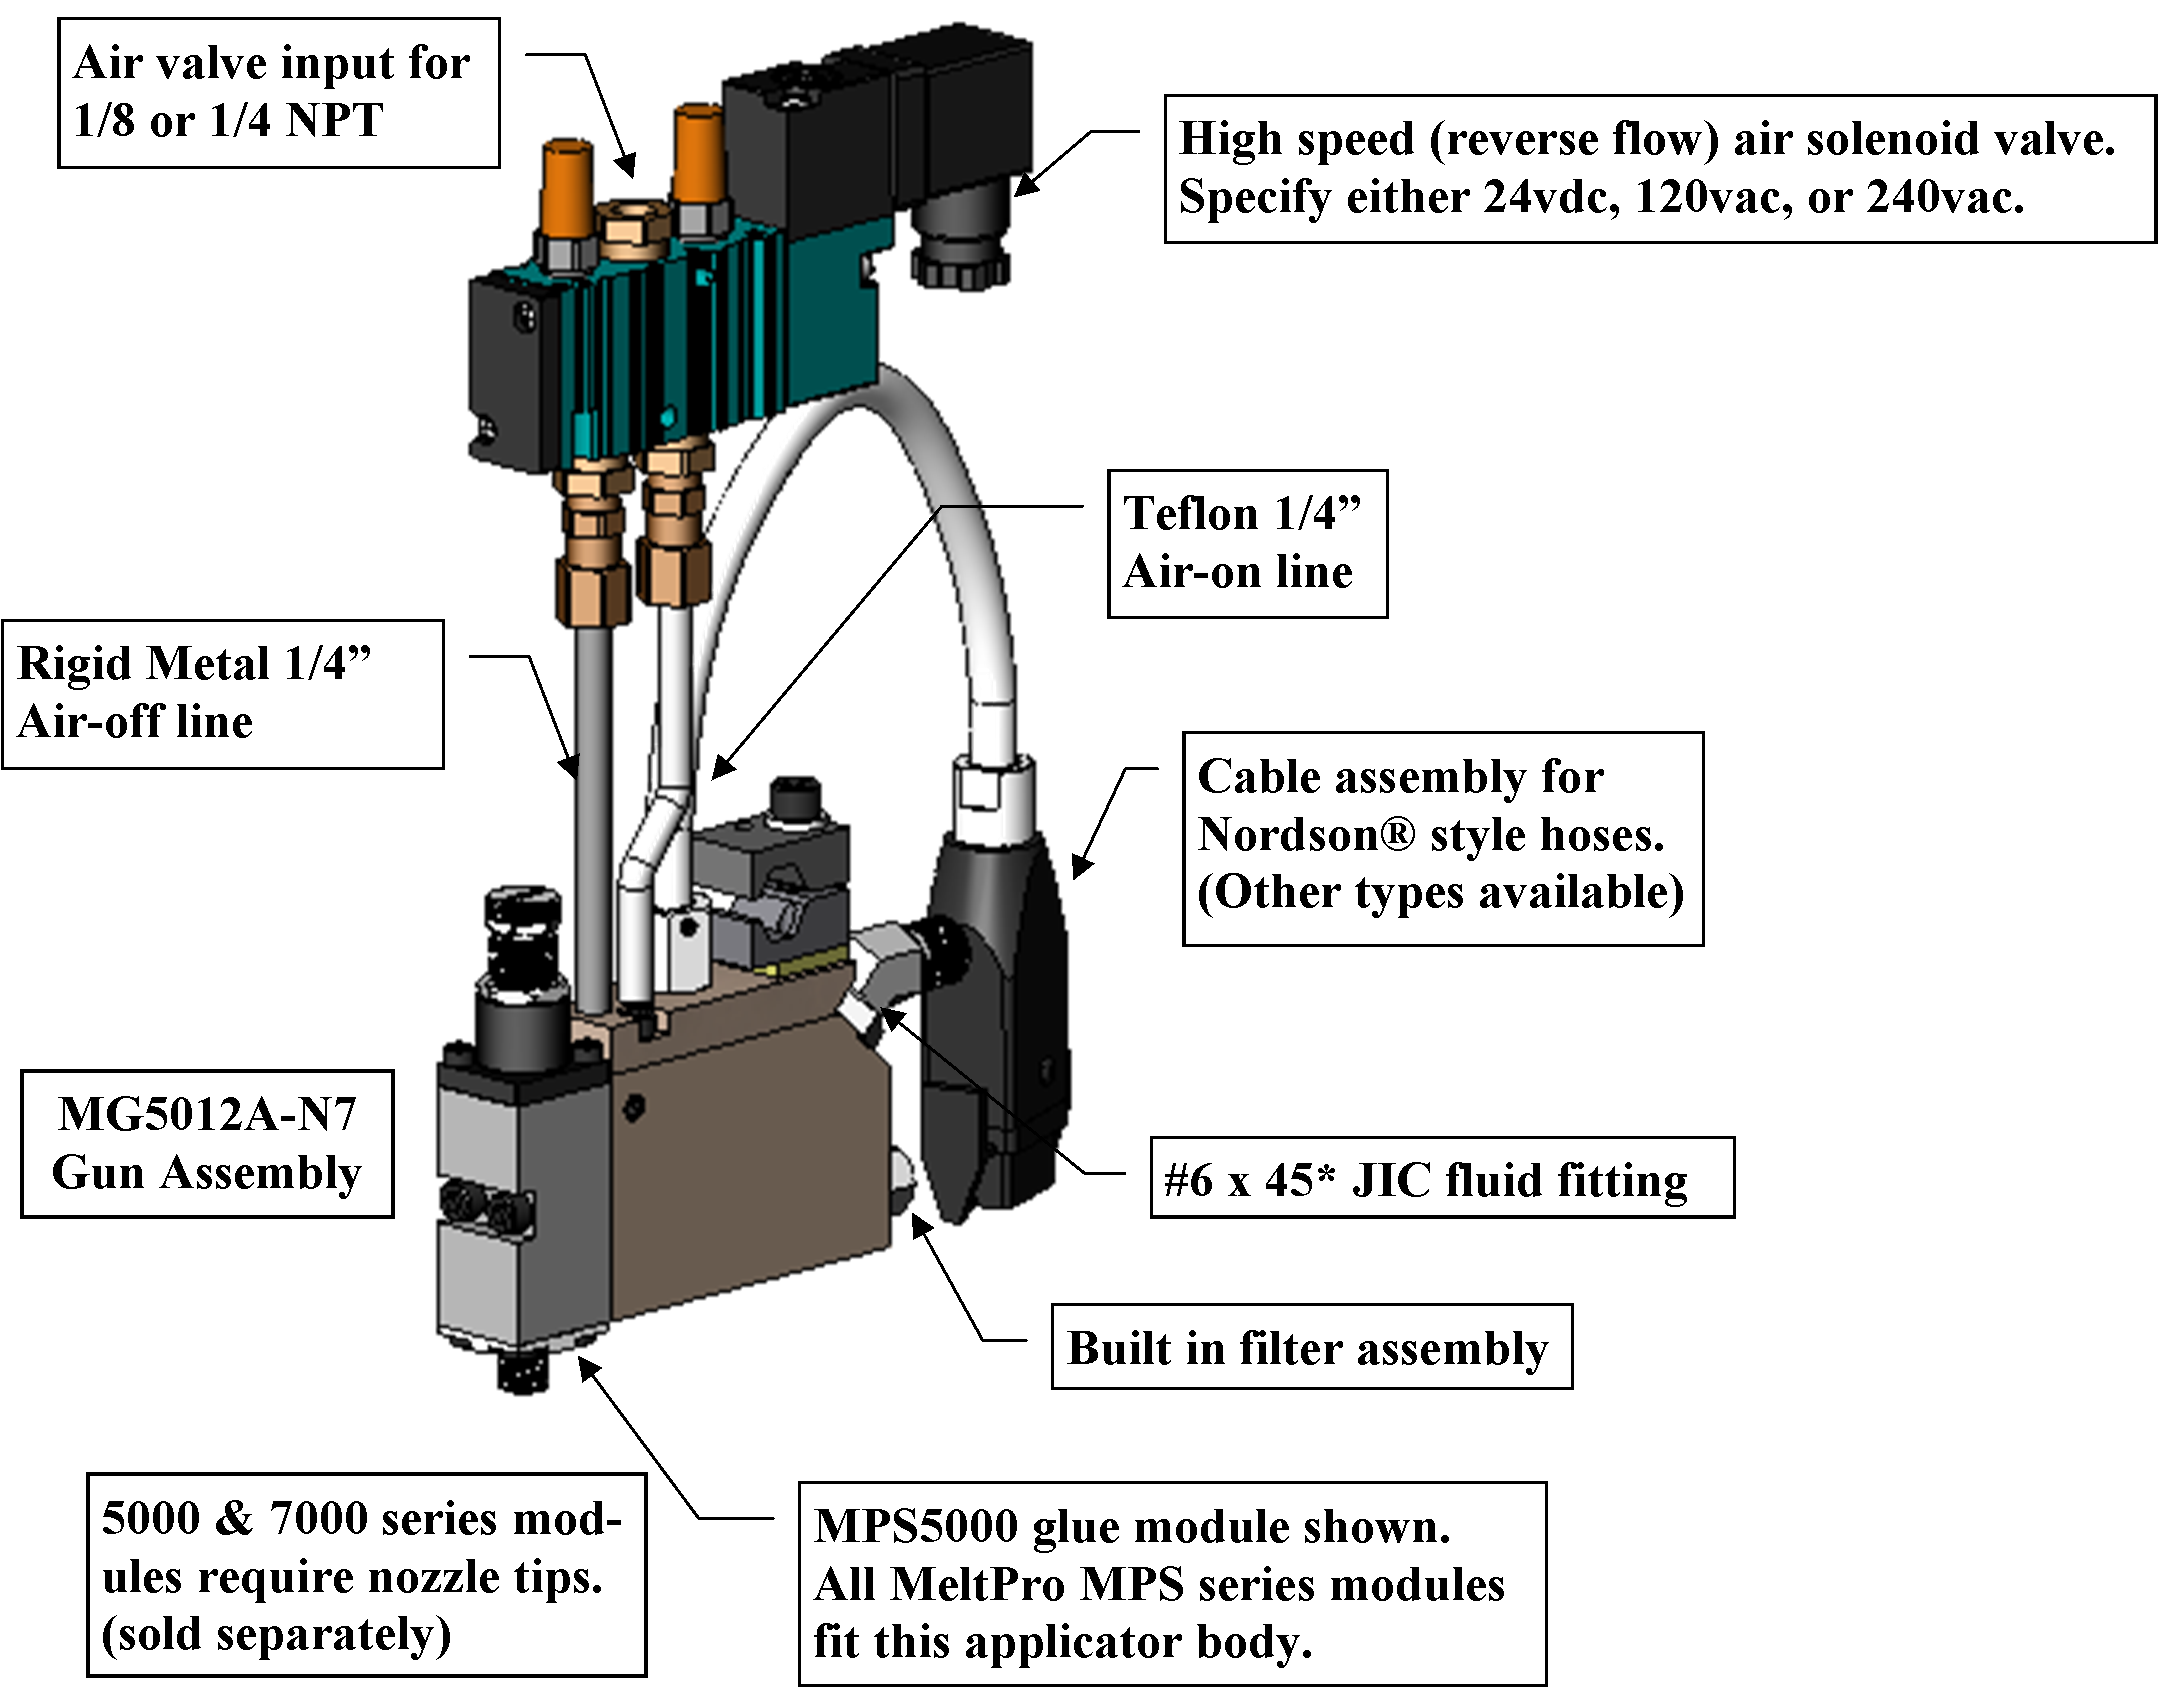
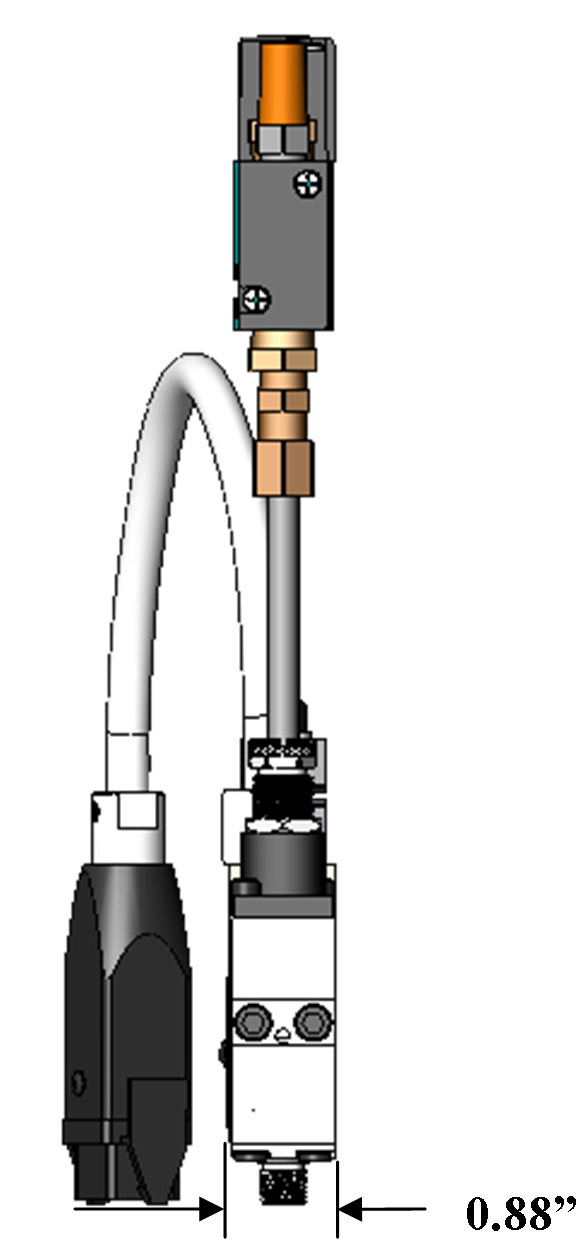
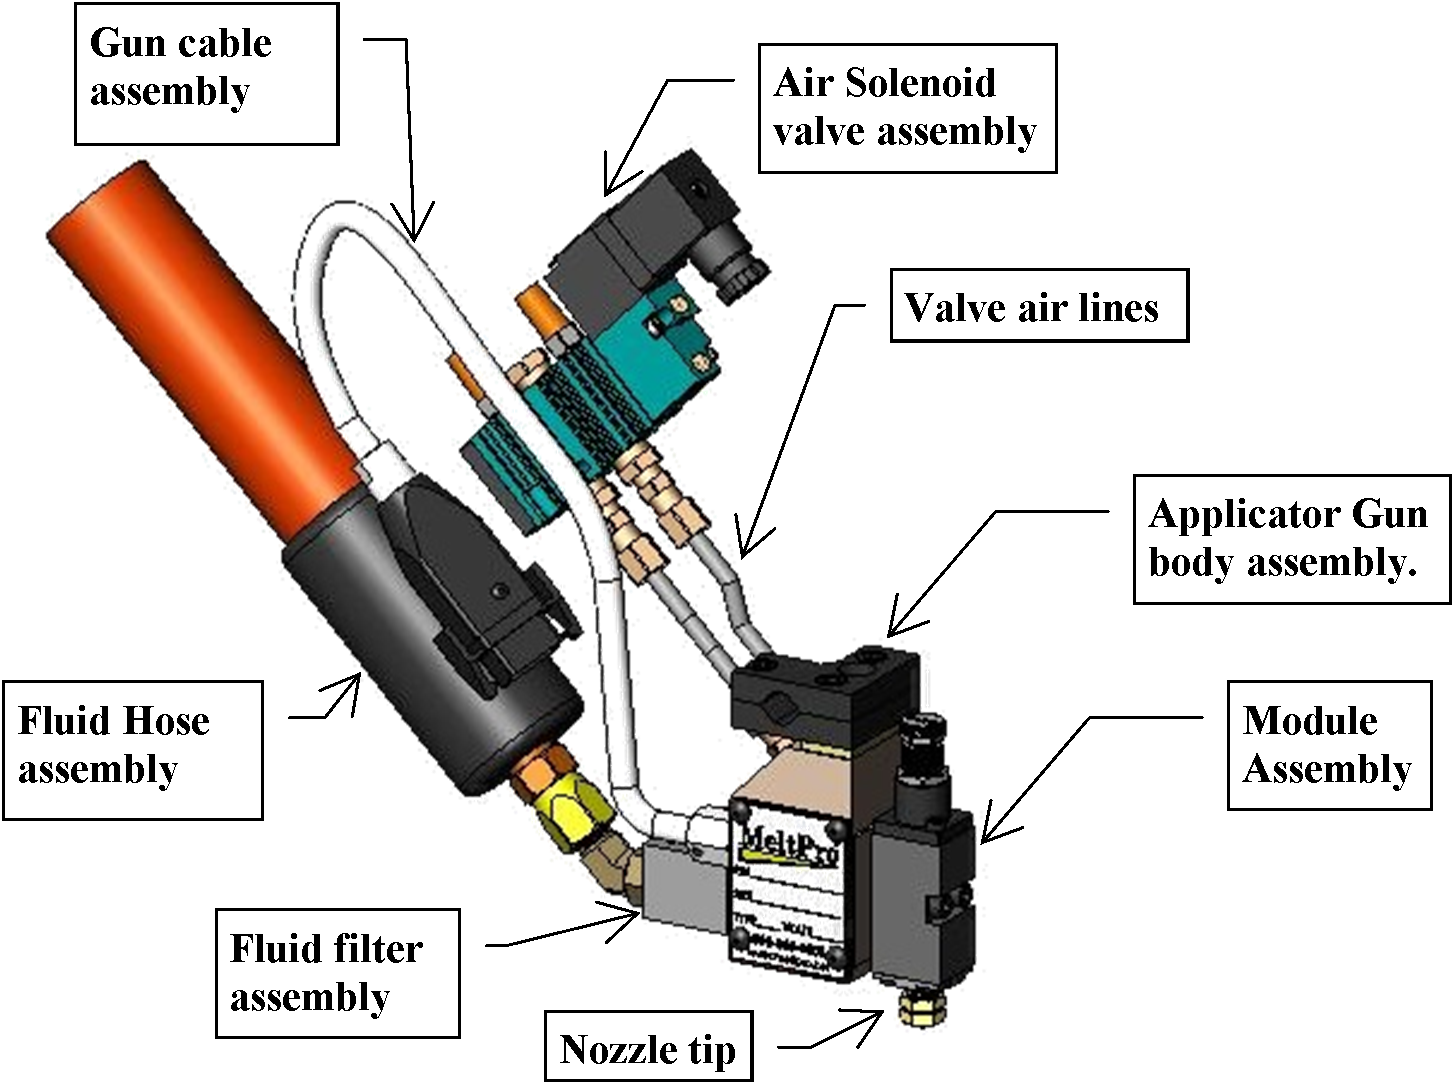
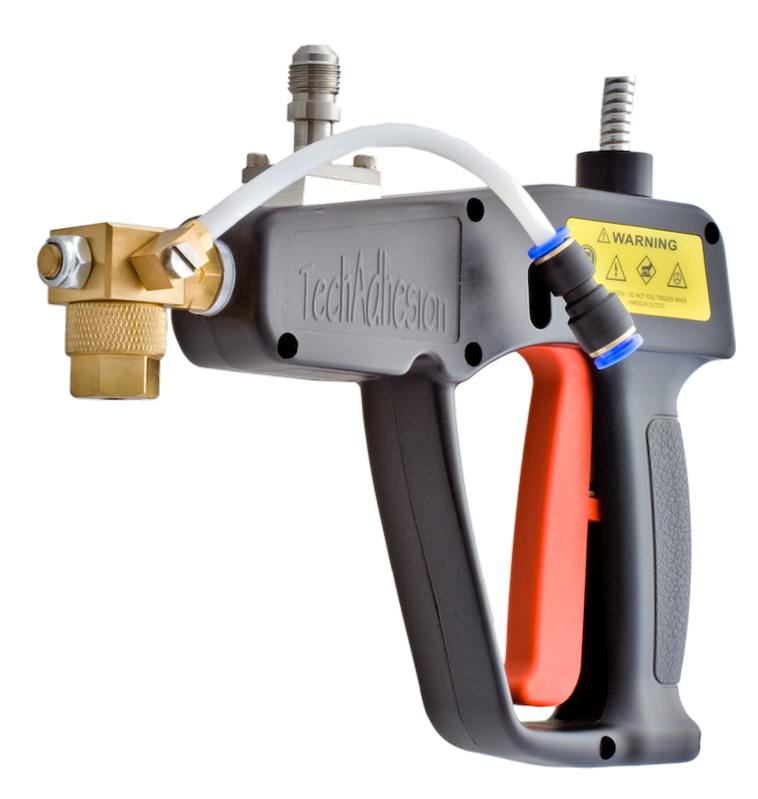
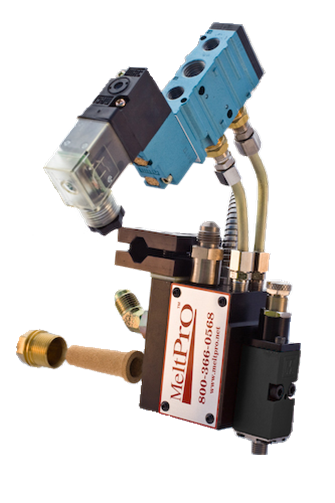
When you go to your production line and look at the “Hot Melt Glue Applicator” (or glue gun), in most cases you will see the same group of items that are shown in the next picture.
However, what you see here is more than just an applicator gun. This would be the complete adhesive application setup.
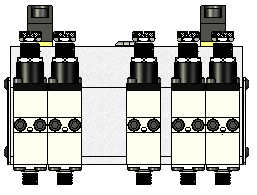
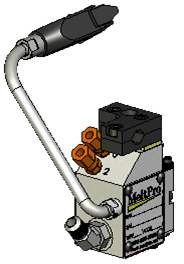
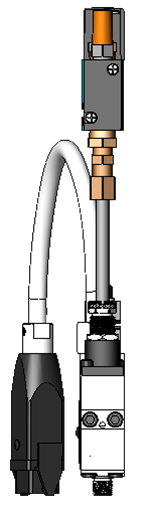
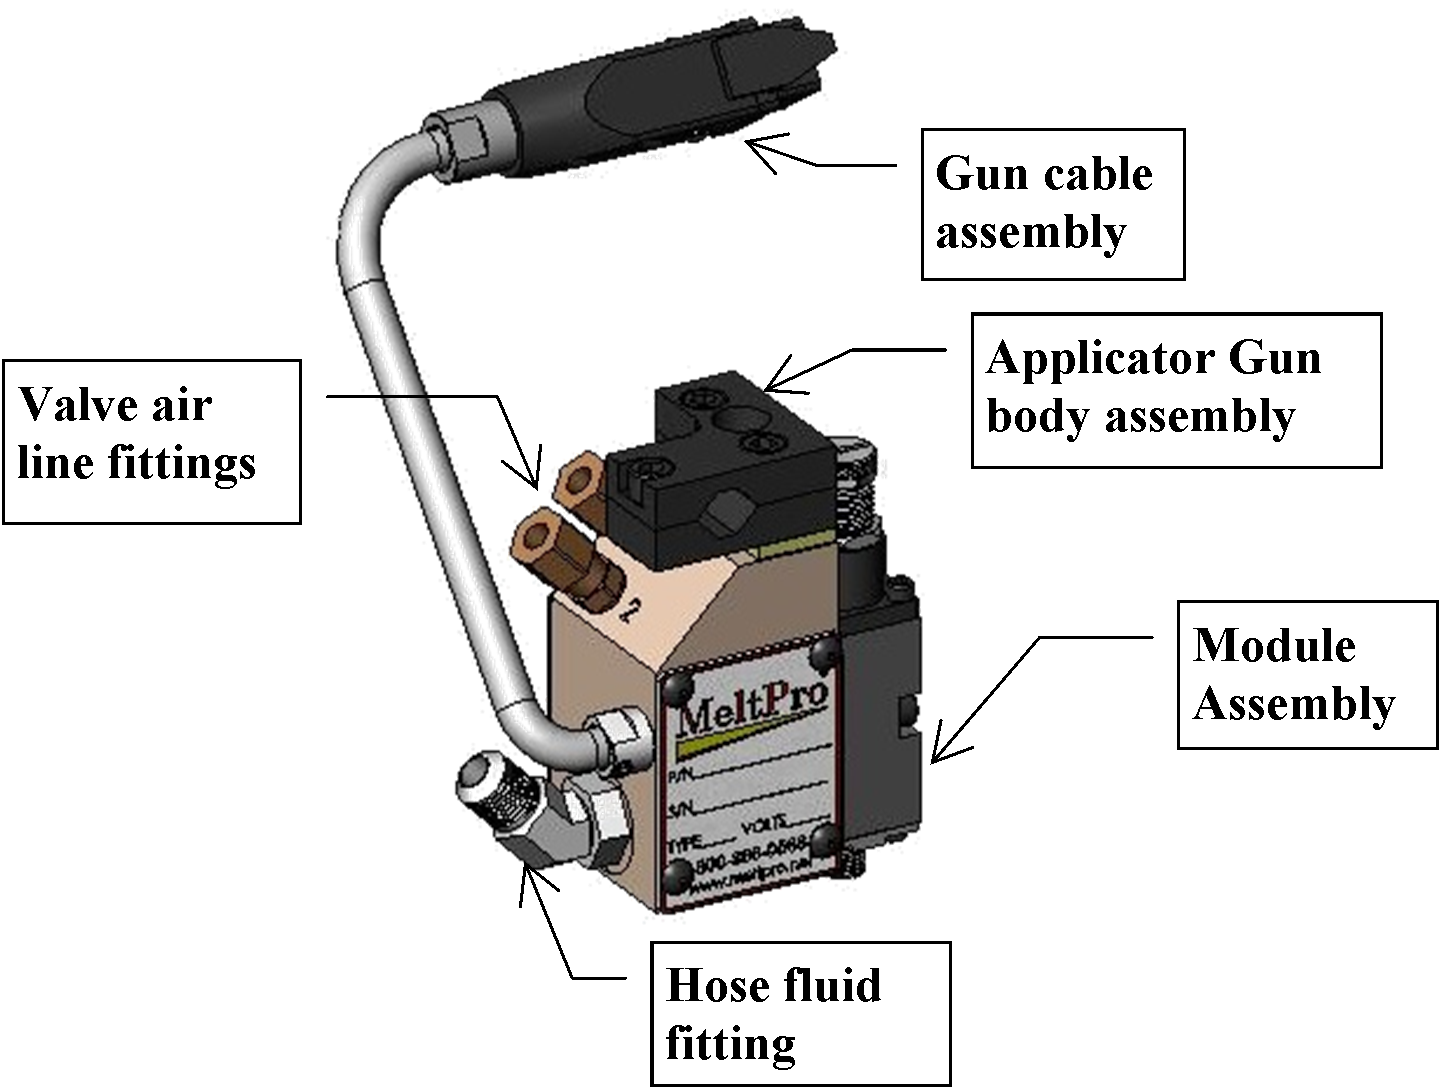
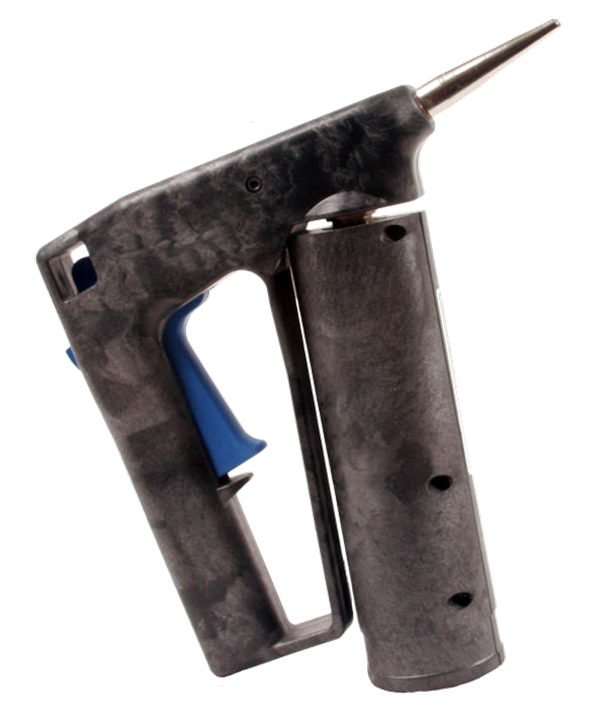
The next picture shows what is typically part of an applicator gun. Even though the glue gun normally comes with an applicator module (gun module) on the front of it, you can purchase the gun with no module(s) if needed. Please contact a MeltPro representative to obtain the correct part number to order what we call a “gun body only” assembly.
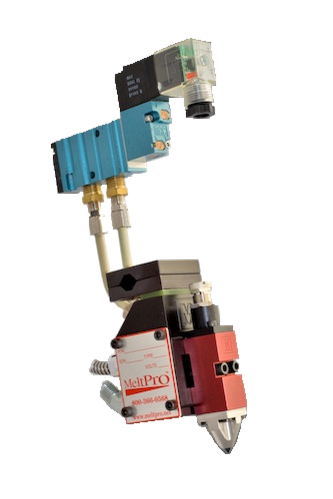
Even though you do not get a complete application setup when you order an applicator gun, MeltPro does produce the rest of the items that are in the first picture. We also have the items that you do not see in the complete setup picture. Items such as the triggering photo eyes, the gun air valve pattern controller, and we can even supply you with line speed encoders if you need them.
Don’t forget that with MeltPro, you do not have to choose from applicator guns that already exist; we will custom design an applicator gun to perfectly fit your needs.
The number of items that MeltPro has to offer far exceeds what can be shown on our web site. Our sales catalog shows a much larger picture of what MeltPro has to offer but even that does not show everything. If you still cannot find the item you are looking for, please contact MeltPro for assistance.